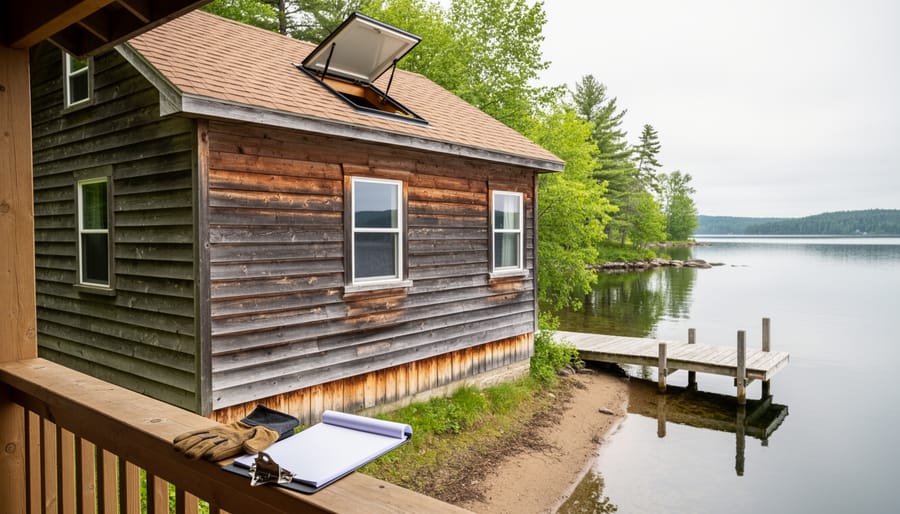
Renovating a family cottage starts with a clear, three-step framework: assess every system and structure, prioritize work by safety and weatherproofing, then create a phased plan with realistic timelines and budget. This methodical approach transforms an overwhelming inheritance into a manageable project, much like the systematic checks sailors perform before each season on the water.
That cottage your family has cherished for decades likely needs attention in multiple areas at once. Roofing, plumbing, electrical systems, docks, and foundations rarely fail on convenient schedules. The temptation to dive into cosmetic updates or jump between urgent repairs creates chaos and cost overruns. Success comes from treating the renovation like outfitting a boat: document everything, address critical issues first, then work through systems in logical sequence.
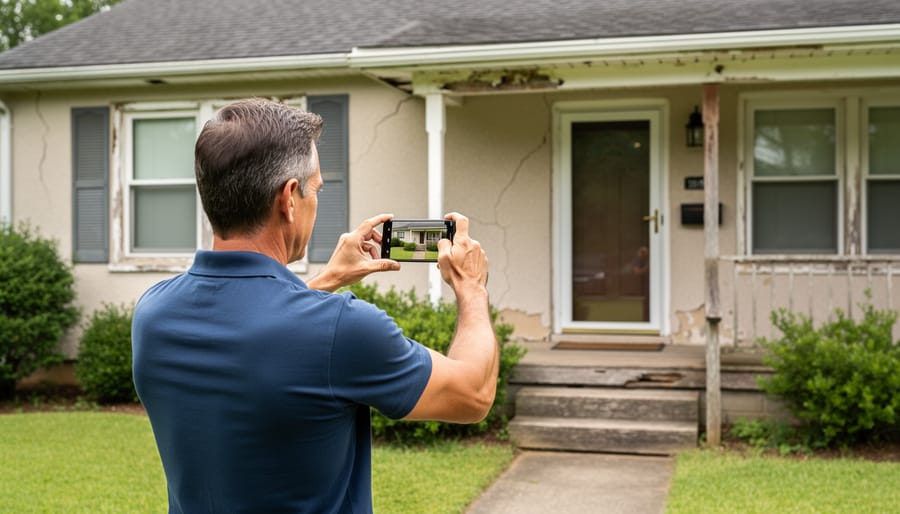
Start with a thorough property walkthrough during different weather conditions. Check the roof on a rainy day, inspect the foundation when the ground is saturated, and examine the dock system at both high and low water levels. Photograph everything. This documentation becomes your renovation roadmap and helps contractors provide accurate quotes.
Safety and structural integrity always take priority. A leaking roof damages everything below it. Faulty electrical panels create fire risks. Compromised foundations only worsen with time. These aren’t negotiable starting points, they’re requirements before you consider new kitchen cabinets or fresh paint.
The cottage renovation process typically spans one to three seasons, depending on scope and whether you’re managing work yourself or hiring professionals. Breaking the project into phases keeps costs manageable and lets you enjoy the property between major construction periods. For comprehensive planning and execution, experienced contractors like PD Home Renovations Inc. provide the expertise needed to navigate complex multi-system upgrades while preserving your cottage’s character and value.
What You’ll Need Before You Begin
Before you swing a hammer or tear out a single wall, assembling the right toolkit and documentation system will save you time, money, and frustration. Cottage renovation starts with information gathering, not demolition, so your first investments should support thorough assessment rather than construction.
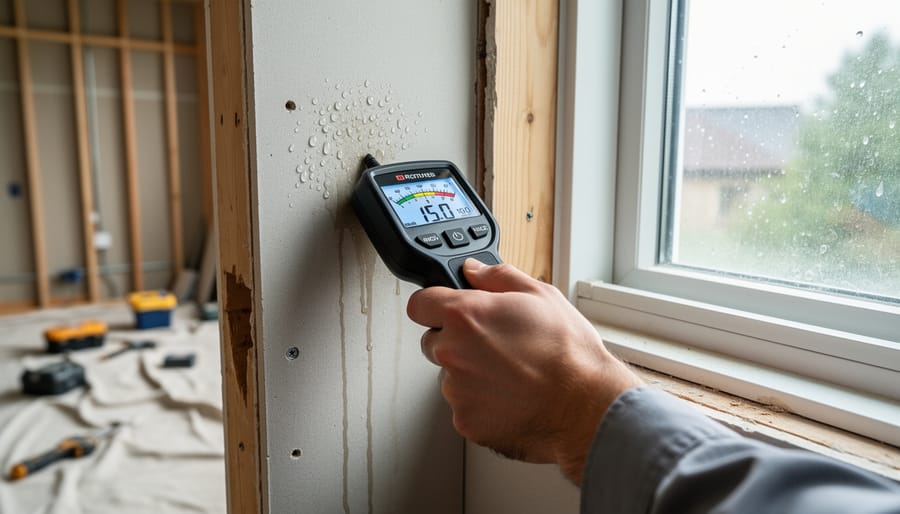
For your initial property inspection, you’ll need a high-powered flashlight or headlamp to probe dark crawl spaces and attics, a moisture meter to detect hidden water damage in walls and floors (especially critical near waterfront), a tape measure for recording dimensions, and a camera or smartphone to document every issue you discover. A notepad or tablet for recording observations completes your basic inspection kit. These tools let you methodically evaluate the cottage’s condition before spending a dollar on repairs.
Beyond physical tools, gather any existing documentation: original building plans, previous renovation records, septic system permits, shoreline surveys, and property tax assessments. If you’ve inherited the cottage, track down family members who might remember past repairs or ongoing issues. This historical context often reveals patterns, like a roof section that leaks every spring or a foundation corner that settles after heavy rains.
Essential assessment toolkit:
- High-powered flashlight or headlamp for inspecting dark spaces
- Moisture meter to detect water damage and leaks
- Tape measure and laser measure for accurate dimensions
- Camera for comprehensive photo documentation
- Notebook or tablet for detailed condition notes
- Level to check floors, walls, and foundation alignment
- Binoculars for examining roof and chimney from ground level
- Screwdriver set for removing outlet covers and access panels
You’ll likely need professional expertise for specialized assessments. A structural engineer can evaluate foundation stability and load-bearing walls, especially valuable for older cottages showing settlement or weather damage. For waterfront properties, marine contractors assess dock integrity, boathouse structure, and shoreline erosion. Electricians can identify outdated wiring that poses fire risks in damp environments, while plumbers evaluate aging supply lines and septic systems.
Start researching local building permit requirements early. Municipal offices, conservation authorities (for shoreline work), and cottage associations all have approval processes that take weeks or months. Securing permits before you need them prevents costly work stoppages mid-project.
Safety Warnings and Critical Checks
Older cottages present distinct hazards that differ significantly from modern homes, especially when located on waterfront properties. Electrical systems installed decades ago weren’t designed for the constant moisture exposure common near lakes and rivers, corroded wiring, outdated fuse boxes, and ungrounded outlets can create fire risks or electrocution hazards. Before you touch any switches or outlets, have a licensed electrician inspect the entire system. If you notice flickering lights, warm outlets, or a persistent burning smell, stop all work immediately.
Foundation problems escalate quickly in waterfront locations. The freeze-thaw cycles that Ontario experiences, combined with fluctuating water tables and wave action, can shift footings and crack concrete over time. Look for sloping floors, doors that won’t close properly, or visible cracks in basement walls. These aren’t just cosmetic issues, they signal potential structural failure that requires engineering assessment before you proceed with any renovation.
Mold and air quality problems thrive in seasonal cottages that sit closed for months. That musty smell isn’t just unpleasant, it indicates active mold growth that can cause respiratory issues. Check behind paneling, under sinks, and in crawl spaces. If the cottage has been shuttered through multiple winters, assume mold exists until proven otherwise. A thorough cleaning might handle surface issues, but extensive growth requires remediation specialists.
Plumbing in older cottages often involves galvanized pipes prone to corrosion, particularly in humid environments. Low water pressure, discolored water, or visible rust on exposed pipes all point to failing systems. Many cottage plumbing setups also include questionable DIY repairs from previous generations, mixing incompatible materials or creating drainage problems. Learning waterproofing basics helps you spot moisture intrusion, but major plumbing overhauls require licensed plumbers familiar with seasonal property challenges.
Marine structures demand particular caution. Docks, boathouses, and retaining walls face constant water exposure and ice damage. Don’t assume these are stable just because they’ve stood for years, submerged components rot invisibly, and hardware corrodes. If your renovation includes these features, contract marine specialists who understand shoreline construction codes and conservation authority requirements. This isn’t territory for weekend DIY.
Step-by-Step Process: Your Renovation Roadmap
Step 1: Conduct a Thorough Property Assessment
Start at the top and work your way down, literally. Grab a ladder, a high-powered flashlight, and your phone camera, you’re about to become intimately familiar with every square inch of this property.
Begin with the roof. Look for missing or curled shingles, sagging sections, and any signs of water intrusion around chimneys or vents. Check the attic for daylight peeking through, water stains on rafters, and adequate ventilation. Then move to the foundation, inspecting for cracks, settling, shifting, or deterioration where concrete meets soil. Waterfront cottages face unique challenges here, wave action and seasonal water level changes can undermine footings over time.
Next, examine every window and door. Test their operation, check for rot in frames, look at the quality of weatherstripping, and note any broken panes or failed seals in double-pane units. These are your first defense against Ontario’s harsh winters.
Now tackle the systems. Turn on every faucet, flush every toilet, and check under sinks for leaks or corrosion. For electrical, test outlets, look at the panel for rust or outdated fuses, and note any flickering lights or warm switches, red flags in moisture-rich environments. Inspect your heating system’s age and condition, whether it’s forced air, baseboard, or a wood stove setup.
Don’t stop at the cottage walls. Your waterfront structures need the same attention. Walk the dock, checking for loose boards, corroded hardware, and unstable posts. Inspect the boathouse for roof integrity, proper ventilation, and foundation stability. A thorough structural inspection of marine structures now prevents catastrophic failures later, and protects your investment in boats and equipment.
Photograph everything. Take wide shots and close-ups of problem areas. Create a simple spreadsheet or notebook organizing findings by location and severity. This documentation becomes your renovation blueprint and helps contractors provide accurate quotes.
Step 2: Prioritize Repairs by Urgency and Impact
Once you’ve documented every issue in your cottage, the real challenge begins: deciding what to tackle first. Without a clear priority system, it’s easy to spend money on cosmetic updates while ignoring the foundation crack letting water seep into your basement.
Start by sorting every needed repair into three categories based on urgency and protective value:
- Critical repairs that prevent further damage or pose safety risks, foundation issues, roof leaks, failing electrical systems, structural compromises, and mold problems. These protect your investment and must come first.
- Important upgrades that improve functionality and efficiency, insulation improvements, window replacements, heating system updates, and plumbing modernization. These save money over time and make the cottage more usable.
- Desirable enhancements that add comfort and appeal, kitchen updates, new flooring, fresh paint, deck refinishing, and interior layout changes. These can wait until the cottage is structurally sound and weathertight.
This ranking prevents the common mistake of pouring funds into a beautiful new kitchen while the roof above it continues deteriorating. Address leaks and structural issues before you plan interior upgrades or you’ll be redoing that work after water damage strikes.
Build a phased timeline that tackles one category at a time, with contingency funds for surprises. Older cottages always reveal hidden problems once walls open up. Sailors know this principle from boat maintenance, fix what keeps you afloat before you add the luxury trim.
Step 3: Set a Realistic Budget and Timeline
Setting a realistic budget starts with getting multiple quotes for prioritized work. For a typical Ontario cottage renovation, expect costs 20-30% higher than comparable urban projects, waterfront access challenges, specialized contractors, and permit requirements all add expenses. Material delivery to remote properties can double your lumber and supply costs.
Build a 25-35% contingency fund into your budget. Older cottages hide problems: you’ll open a wall to find knob-and-tube wiring, discover rot behind intact-looking siding, or uncover foundation issues once you start repairs. Waterfront structures particularly surprise owners, what looks like minor dock damage often reveals underwater pilings needing complete replacement.
Break your budget into phases matching your priority list. Allocating funds to critical structural work first prevents throwing money at cosmetic upgrades while the foundation crumbles. Plan for $15,000-$30,000 minimum for basic weatherproofing and systems updates on a modest cottage, with full renovations easily reaching $100,000-$250,000 depending on scope.
For timeline planning, Ontario’s short construction season matters. May through October offers your best weather window. Foundation work needs frost-free ground. Exterior painting requires consistent temperatures above 10°C. Schedule structural and envelope work for summer, leaving interior projects for shoulder seasons.
Factor in 2-4 months for permit approvals, longer if conservation authority review is required. Add buffer time for weather delays, a week of rain can halt roofing or foundation work completely. A realistic timeline for phased cottage renovation runs 18-36 months from assessment to completion, not the optimistic 6-month estimate many owners initially imagine.
Step 4: Secure Permits and Approvals
Most cottage renovations in Ontario require permits, and waterfront properties face additional layers of approval. Start by contacting your township or municipal building department, even in remote areas, you’ll need permits for structural changes, electrical work, plumbing modifications, and additions. Don’t assume your cottage is “too small” or “too rural” to require permits. Enforcement is increasing, and unpermitted work creates problems when you sell or make insurance claims.
If your renovation involves work within 30 meters of the shoreline, dock repairs, boathouse upgrades, retaining walls, or septic systems, you’ll need approval from your local Conservation Authority. These reviews protect water quality and natural habitat, and the process typically takes 4-8 weeks. Submit detailed plans showing exactly what you’re doing and how far from the high-water mark.
Check if your cottage sits within a regulated area, historical district, or private association with architectural controls. Some lake associations require design approval for exterior changes. Heritage designations limit what you can alter on older structures.
Begin the permitting process before ordering materials or booking contractors. Budget 6-12 weeks for approvals in rural areas where building departments operate part-time. Keep all permit documentation, inspectors will want to see it, and future buyers will ask for proof of permitted work.
Step 5: Begin with Foundation and Envelope Work
Once you’ve secured permits and assembled your budget, tackle foundation and envelope work before touching a single interior surface. This isn’t arbitrary sequencing, it’s protecting your investment from the elements while you renovate.
Water is your cottage’s greatest enemy, especially in waterfront locations where moisture comes from every direction. A leaking roof ruins new drywall. A compromised foundation undermines structural repairs. Drafty windows waste heating dollars and invite mold. Address these issues first, and everything else becomes easier.
Start with foundation stabilization if your assessment revealed cracks, settling, or water infiltration. Older cottages often have fieldstone foundations that need repointing or concrete piers requiring leveling. This work must happen during dry weather when the ground is accessible and workable. In Ontario, that typically means late spring through early fall.
Move to the roof next. Replace missing shingles, repair flashing around chimneys and vents, and ensure proper drainage away from the structure. A sound roof protects all the work happening below it. Don’t scrimp here, waterfront environments accelerate roof deterioration.
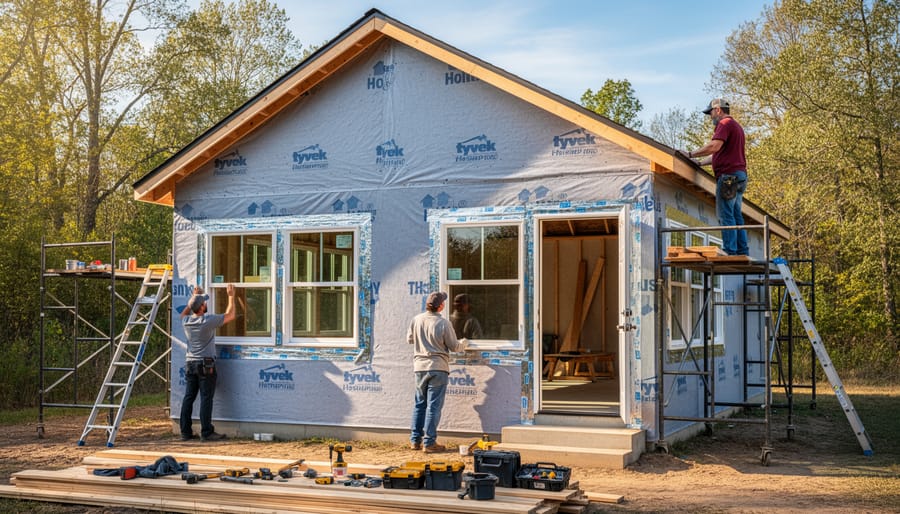
Windows and exterior doors come third. Modern energy-efficient units dramatically reduce heating costs in seasonal cottages while eliminating drafts that make spaces uncomfortable. Proper installation includes flashing and sealing against wind-driven rain, which is common near water.
Finally, address exterior siding and trim. Repair rotted boards, replace failing materials, and apply fresh protective coatings. This completes your weather envelope, the critical barrier between interior spaces and harsh outdoor conditions.
Time this work for settled weather periods. You’ll have the cottage opened up and vulnerable during envelope repairs, so avoid spring runoff season and late fall storms. Summer and early fall offer the most reliable windows for exterior work in cottage country.
Verification and Next Steps
Once you’ve completed the foundation and envelope work, verification becomes your safety net. Schedule inspections at critical milestones, after electrical rough-in, plumbing installation, and before closing up walls. Municipal building inspectors will catch code violations early, saving you costly do-overs. For seasonal cottages, test all systems under load: run water through every fixture for at least 15 minutes, checking for leaks and proper drainage. Flip breakers repeatedly to confirm electrical panels handle demand without tripping. If the cottage has been closed for years, air quality testing for mold and radon makes sense before you declare victory.
Winterization checkpoints matter even if you plan year-round use. Insulation values, heating system capacity, and proper ventilation prevent the freeze-thaw damage that destroys cottages. Drain and blow out water lines if you’re staying seasonal. Check that your seasonal storage tips extend to boat equipment, properly stored motors, sails, and marine electronics last decades longer.
For inherited property documentation becomes critical now. Photograph completed work, file permits, and keep receipts. This record protects resale value and proves you’ve maintained the cottage responsibly. Plan your next phase only after living with the completed work for a season, you’ll discover what actually matters versus what seemed important on paper. That dock repair might jump ahead of the kitchen renovation once you’ve spent a summer launching your sailboat from a wobbly structure.
Common Questions About Starting a Cottage Renovation

How long does a typical cottage renovation take?
A modest cottage refresh can take 2-4 months, while major structural renovations often require 6-12 months or more. Waterfront location adds complexity, expect delays from weather windows, permitting, and marine contractor availability, especially if you’re upgrading docks or boathouses alongside the main structure.
Should I renovate in phases or tackle everything at once?
Phased renovation makes sense for most cottage owners because it spreads costs, lets you test improvements before committing further, and keeps the cottage partially usable during work. Start with critical repairs (roof, foundation, weatherproofing), then move to systems and interiors in subsequent seasons.
Can I do any of this work myself?
Assessment, planning, demolition, painting, and simple finishes are reasonable DIY territory if you’re handy. Leave electrical, plumbing, structural changes, and anything touching waterfront regulations to licensed professionals, mistakes in these areas create safety hazards and permitting nightmares that cost far more to fix than hiring correctly from the start.
What’s the best season to start a cottage renovation?
Late spring through early fall offers the most reliable weather for exterior and structural work in Ontario. Many owners begin assessment and planning during winter, secure permits by early spring, and launch construction in May when contractors and materials are available and conditions allow foundation, roofing, and marine structure work.
Waterfront restrictions deserve special attention because they directly affect your timeline and scope. Conservation authorities regulate shoreline alterations, dock replacements, and any work within the regulated setback from the water, typically 30 meters inland. Approvals can take 6-12 weeks, sometimes longer during peak season. If your renovation includes updating a dock, boathouse, or retaining wall, start those permit applications early and expect conditions on construction timing to protect fish spawning windows. Many sailors discover mid-project that their planned improvements trigger additional requirements, so involve the conservation authority during initial planning rather than after you’ve committed to a timeline.
Don’t let these considerations paralyze you. Most cottage owners successfully navigate the process by building buffer time into schedules, staying flexible with contractors, and accepting that rural waterfront projects rarely proceed exactly as planned. That unpredictability is part of cottage life, just as weather shifts your sailing plans, it shapes renovation timelines too.
Starting a cottage renovation can feel overwhelming, but the path forward becomes clear once you commit to assessment and planning before any demolition begins. The time you invest upfront in understanding your property’s condition, prioritizing repairs, and creating a realistic roadmap will save you from costly mistakes and project delays down the road.
This isn’t just about fixing up a building. Your cottage represents decades of family memories and countless hours on the water. Every improvement you make protects those memories while creating space for new ones. For the sailing community, a well-maintained cottage means more than comfortable accommodations, it’s your staging ground for weekend races, the place where you prep your boat for the season, and the waterfront base that makes spontaneous sailing trips possible.
The dock that needs reinforcing, the roof that requires attention, the electrical system crying out for an upgrade, these aren’t obstacles. They’re opportunities to strengthen your connection to the water and ensure your cottage remains a reliable haven for generations of sailors to come.
Take that first step. Grab your inspection tools, start documenting, and trust the process. Your cottage is worth it.